🧠 This post is fully human-written: all prose with the exception of the IoC information. Because it was time-sensitive, Claude was used to accelerate the RAT analysis and build an IoC-detection script.
As I live in Canada, this information was reported to the appropriate Canadian agencies (CCCS et al). The payload-laden image does not trigger any AV engines on VirusTotal.
The attacker’s identity is fictitious, but there are uninvolved individuals with the same name that they may be confused for and have been omitted from this piece.
On Reddit there’s a few others in the Rust community who mentioned they were targeted as well.
This week I came in far-to-close contact with a fake-interview scam designed to backdoor my machine, and from the context of the emails, I assume my packages on crates.io.
Note: I’m calling it the “PinpinRAT” because of some of the internal strings, but it’s possible this has another name out there. I couldn’t find any other references to it online.
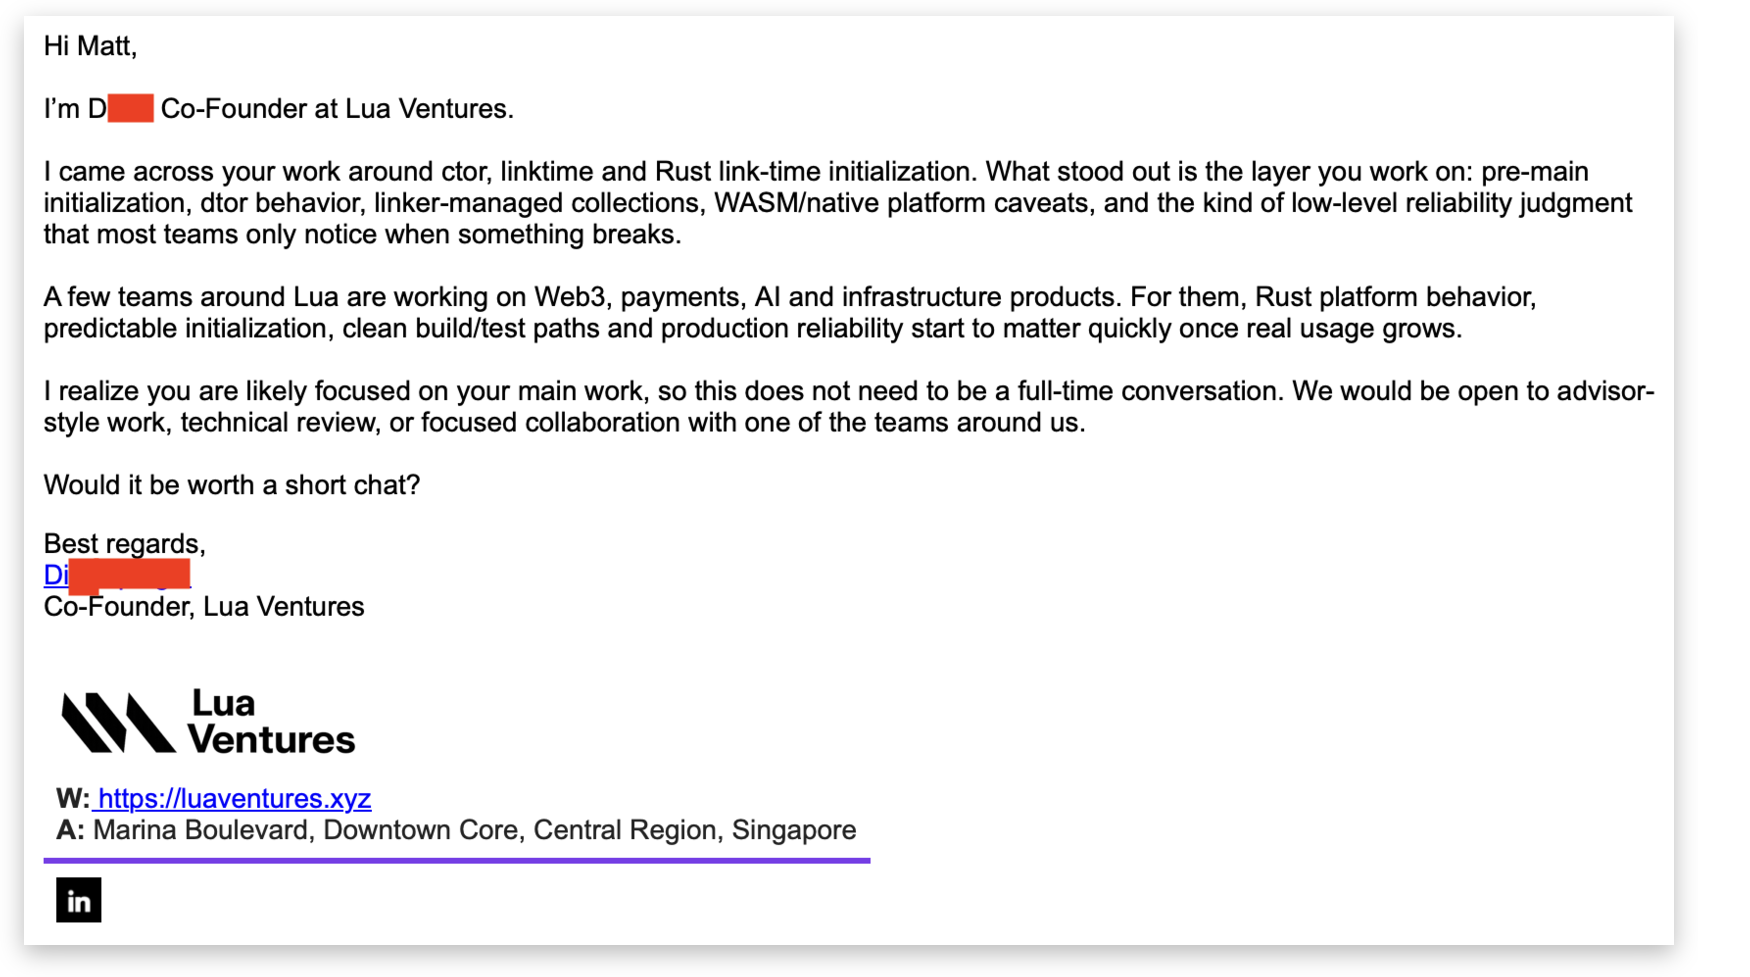
A week and a half ago I received an email from “D█████ S████” claiming to be from Lua Ventures, a (unbeknownst to me at the time) defunct Singapore-based VC in the DeFi space. To be clear: this is a fabricated persona, and the name was likely chosen to be easily mistaken for one of a number of real people with the name.
It looked like a real email, including a link to a somewhat boring, but legitimate-looking LinkedIn profile.
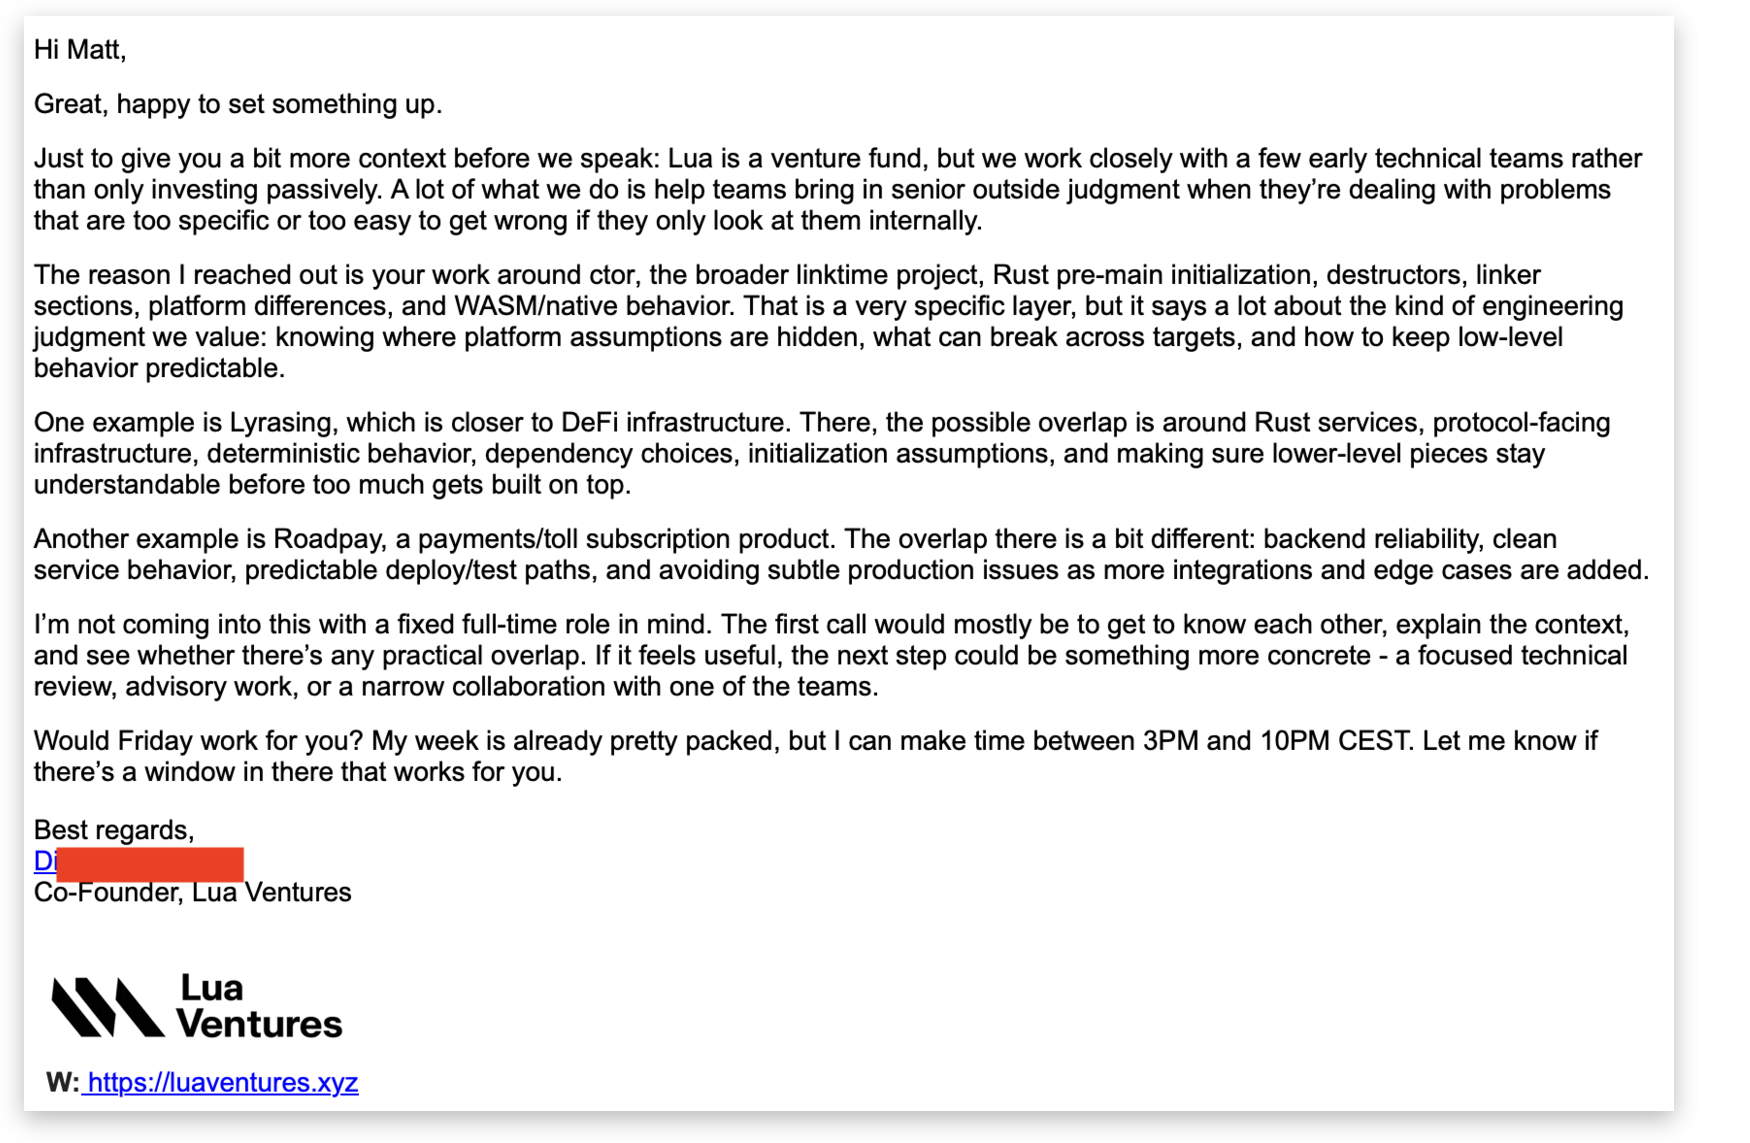
The attacker even name-dropped two of their investments that were specifically looking for advisory work: Lyrasing and Roadpay. Searching for either of the companies wasn’t really a flag - they both had some very basic web presense, but nothing that would indicate they were fake rather than just early stage. (archive.org snapshot of roadpay.cc).
We went back and forth on a meeting time and eventually settled on a time we were going to chat. There was nothing odd about the call itself, either. A somewhat-difficult-to-understand man with a German accent was on the other line. He said he was taking the call while travelling which was a bit odd, but again, not necessarily a flag.
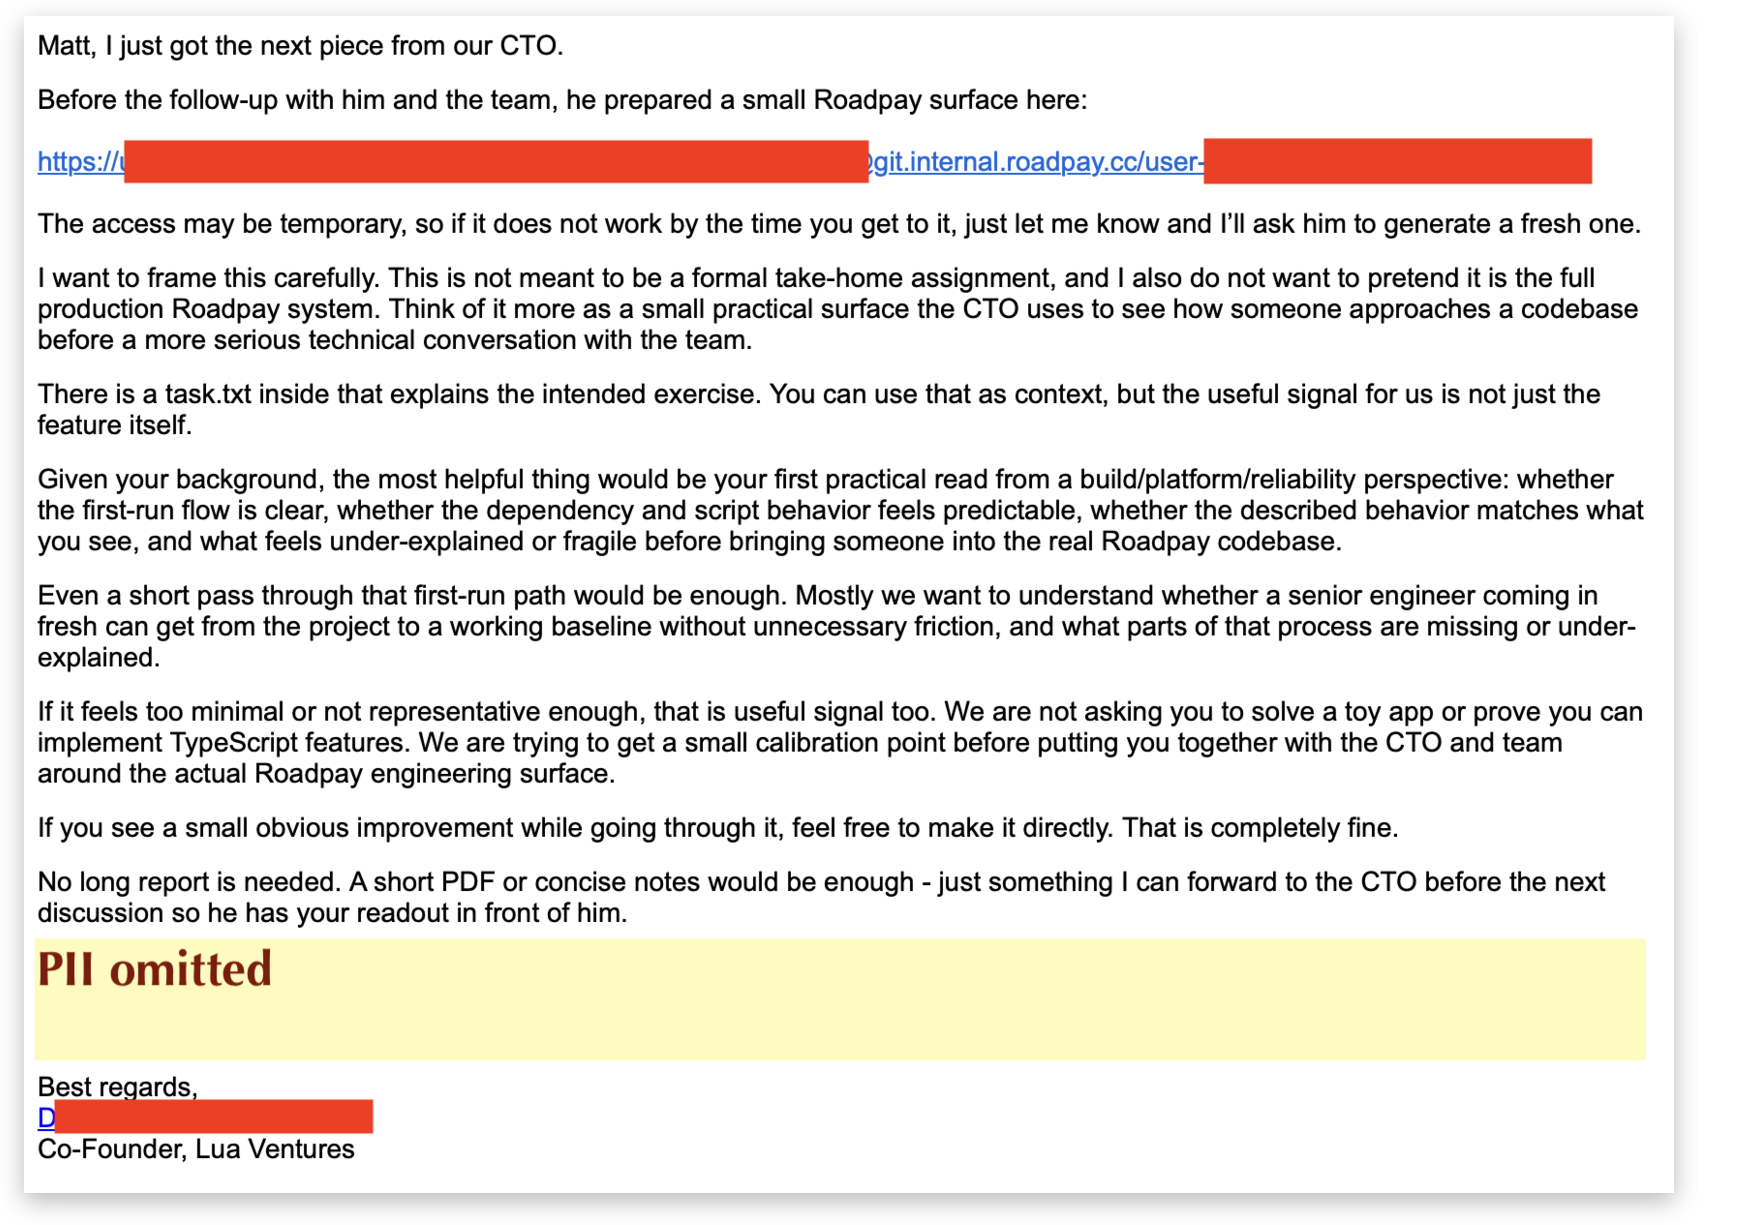
After the call came the bait. A follow-up email that offered up a “test”.
At this point I was mildly annoyed, but not suspicious. I cloned the repo, but the first true red flag only fired here.
Where I got lucky: they sent me a TypeScript repo. It didn’t make sense to me. The instructions looked more like a TypeScript job interview than any sort of architecture analysis. I decided to zip up the repo and toss it into the Claude to get a quick scan - a combination of caution and laziness.
A few moments later it had identified some oddities:
Notably, the root package.json has no postinstall/preinstall hook — interesting, because they use patch-package, which is normally wired to a postinstall. Let me check every package.json for lifecycle scripts, then audit the patch files (the real risk surface — patches can inject arbitrary code into node_modules).
That piqued my interest. I scanned the directories myself and noticed a fairly unreasonable number of patches/ directories. The first few I checked seemed innocent enough, but as you might have guessed, they were just trying to add noise so the real payload wouldn’t get caught.
While I was checking slowly by hand, Claude identified first signs of PinpinRAT:
I found it. This is a malicious payload. Embedded in the typescript+5.9.2.patch file — inside what is presented as a routine “module specifier” patch to TypeScript — there is a base64-blob self-executing obfuscation stub injected at the very top of both _tsc.js and typescript.js:
This decodes a base64 string, XOR-decrypts every byte with the key 73, and runs the result through new Function(…) with require, process, Buffer, etc. handed in. That is a hidden code-execution payload that fires every time tsc or anything importing typescript.js runs — i.e. on the very first npm run typecheck / build / dev.
… and that’s the point where I decided to stop poking the bear on my own machine. I zipped it up with a password to stop myself from accidentally detonating it and kept running the analysis in the sandbox.
The Trap
The repo is themed as a ferry-ticketing app named “Ticket Harbor”. The task.txt included in the bundle was a plausible set of boring tasks, but ended with:
Run the repo typecheck, test suite, and relevant desktop/server build commands before submitting.
That instruction is the trap that gets you.
The chain works like this:
Four separate postinstall hooks run patch-package. But one of them also runs git update-index --skip-worktree on the patch files, which hides them from git status.
The typescript+5.9.2.patch injects a self-executing stub at the top of typescript.js and _tsc.js. This is a lightly-obfuscated blob fed into new Function(...) (avoiding eval, presumably to avoid malware detection).
That loader reads a hidden chunk appended to a file named operators/3.png, runs a small embedded WASM stub (in a custom wAsm chunk), then spawns a detached, silent Node process carrying a 1.68 MB obfuscated second-stage payload.
It cleans up after itself at three layers: the git skip-worktree trick, the dropper rewrites the patch to delete its own injected lines after first run, and the stage-2 temp directory self-deletes on execution.
The actual payload is a RAT (a remote-access trojan). I was originally worried this was a credential stealer but that’s a lot worse. PinpinRAT is nested in three obfuscated layers which were a pain to unwrap: obfuscator.io (which claims LLM protection, hah), and two further base64 layers.
What it drops
In the interest of 1) quickly sharing this info and 2) not accidentally detonating malware on my own machines, I let Claude tear apart the actual trojan in its sandbox and had it describe it to me.
To be absolutely clear: Claude was able to reverse engineer multiple levels of obfuscation over about 5 minutes of work, which is far faster than I could have.
The drop is a full remote-access trojan that seems to have been put together by someone who knows what they are doing. It sets up an RSA key locally and uses AES-256-CBC as a session key.
On startup it calls a checkin routine that harvests and exfiltrates a host fingerprint:
primary IP address (enumerates all non-internal interfaces), plus all IPs
username (os.userInfo().username)
hostname
OS type + release + platform + architecture
process PID and full process.argv
Node version
It generates an RSA-2048 keypair and a random AES-256 session key (aes_psk), then all subsequent traffic is AES-256-CBC encrypted with an HMAC-SHA256 integrity tag.
It supports the following commands:
env — JSON.stringify(process.env) dumped and sent back.
upload — reads an arbitrary file path and exfiltrates it.
download — writes attacker-supplied bytes to any writable path.
spawn — runs an arbitrary process with optional shell expansion.
ls / cd / pwd / cp / mv — general filesystem primitives.
dns — makes the host resolve arbitrary names through a specified resolver (for DNS tunneling?).
dismantle — self-removal.
Indicators of Compromise
If you ended up running one of these, you should immediately disconnect your system from the network and rotate your credentials from another machine. Remediation should be straightforward, but consider your credentials (including cookies and password-protected secrets) compromised.
These are some indicators of compromise found in the PinpinRAT malware:
C2: 89.124.107.161:80
Scheduled task (Windows): PinpinWrappedJs
Process masquerade (macOS): com.apple.WebKit.Networking
Env vars: NODT_PAYLOAD_PATH, NODT_PAYLOAD_ARGS
PNG chunk guard: WASMPACK (wAsm)
PINPIN_NO_AUTOSTART=1: stops persistence
cronjob with mutex.js (only if the RAT had permission, may not exist on macOS)
Anchor strings in typescript.js: 12ff4b51, ticket-harbor-tsc-shim-anchor
There’s a few places I should have seen flags earlier on. The goal of the campaign is to keep the flags subtle enough they don’t trigger your defences, but you need to be vigilent enough to see when enough yellow flags stack up to a red one.
The messages have some LLM tells to them when you look closer. That’s probably a sign that you should approach anything with extreme skepticism.
The LinkedIn profile looks real at first glance, but it’s filled with gibberish (“BSc(Hons), MA (Dist), PGDipFM, CEng”?) that should at least trigger sort of salad vibes. No real activity.
The social media link on their website has a real history, but the name was changed in November 2025. The posts are all pretty vacuous, vague praise for companies that aren’t really described in any detail.
None of the companies that had websites had a real presence beyond their flashy websites.
They never sent a proper invite - it was just a time and a Google Meet. What VC doesn’t use a calendar? Their camera was off the whole time and they were “travelling”.
And the overall approach, a VC fund based in Singapore, operating out of CEST, reaching out to a developer in Canada, with domains targeting American customers but ending in .cc. It’s far more difficult to check credentials of an organization that’s so far away.
Nothing was obvious without hindsight, but the missing pieces are there if you look at the whole thing together.
So who was this?
It’s impossible to say for sure, but this was targeted, had a pretty convincing cover story with a fake persona, multiple fake websites with stolen history, and a patient timeline. The git trap was sophisticated. This “fake-interview scam” has been a theme for a number of actors in 2026.
Who is actually behind this is the responsibility of the agencies now. What is worth noting is that this was targeted to developers like you and I, and that I was lucky enough to see a red flag right before springing the trap.
And to be honest, what’s terrifying and sobering to me is that if this had been a Rust repository with a booby-trapped build.rs script, I might have even fallen for it.
There Is Life Before Main in Rust
Disclosures
🧠 This post is 100% human-written. Claude was used for feedback and to assist with the linker symbol diagram. Cursor was used for feedback and to ensure examples were compilable.
The author of this post is deeply interested in the topic of life-before-main: he is the author of the ctor crate, and the creator of the linktime project that we’ll be using in the examples below.
Every Rust binary has one thing in common: fn main(). If you come from the C world, that might be more familiar as int main(argc, argv). Some platforms might obfuscate it a bit more, but under the hood, every binary has an entrypoint.
We’re going to discuss what happens beforemain and what interesting things we can do there. In addition, we’ll be showing some novel techniques for mutable data that aren’t in common use in the Rust ecosystem today.
This post is a deep dive into some technical details of how Rust source becomes a Rust binary. Some background knowledge may be helpful to the reader, including:
What might not be familiar to most developers is how you get into the main function. You see, under the hood for every language is the runtime. C has one: the C runtime that you might recognize as libc. Rust also has its own runtime: the Rust standard library. And because C is the lingua franca of runtimes for most executable code 1, Rust builds its own runtime atop of C’s, effectively building its own higher-level abstraction encapsulating C’s.
A runtime is a bit fuzzy to define. It’s both the executable code that lives on disk and compilable headers and libraries used at compile time. But the purpose of a runtime is always the same: integrating developer code with the platform’s operating system.
There’s an entire ecosystem of processing that happens before the function you declared as main starts up. C uses this to configure allocation, file access, thread-local storage and other C runtime services. Rust uses this time to configure parts of its own language and runtime. Specifically, Rust has infrastructure to handle panics and unwinding. Rust also needs to translate the C-style program arguments 2 into its own std::env::args interface. The machinery for all this is visible in the Rust compiler project.
Runtimes make use of this pre-main phase because it guarantees (1) running before user code, and (2) a single-threaded, highly-consistent and predictably-ordered environment, which allow for reliable and deterministic initialization.
By not taking advantage of this environment, you are missing out on a very useful bootstrapping phase. We’ll see later on in this post how we can build some useful primitives making use of life before main.
Entry Points
A binary starts when the operating system’s loader 3 - the part of the OS that loads the binary into memory and sets up the environment - hands off control. The runtime is responsible for accepting the hand-off from the loader. There’s a platform-specific hook on every OS that accepts the hand-off - to some extent this is the real main. On Linux, the entry point is stored in the e_entry field of the ELF header, and by default, the linker places the address of a symbol named _start there. A similar hook exists on Windows, and boots the executable in a function named _WinMainCRTStartup. At this point the C runtime has a chance to configure itself, and the way that all runtimes do this is via initialization functions.
In early iterations of runtimes, bootstrapping was a static tree of function calls: initialize file I/O, initialize the allocator, etc. As runtimes became more complex, this tree of function calls became more complex, and binary sizes increased to absorb more C runtime functionality that they may or may not need.
Over time, linkers developed the ability to discard unused code before even writing the binary to disk (including unused parts of the C runtime), and with that came a need for a replacement for the static init call trees.
The most popular method 4 of declaring init code came from GCC: __attribute__((constructor)). The way this worked was to place a list of init functions into a contiguous chunk of the binary on disk. When the C runtime started, it could walk through each of these functions and call them, allowing various bits of the C runtime to request initialization without strongly coupling subsystems, and allowing the linker to jettison unused subsystems, init code and all.
Eventually the need for constructor ordering became important enough that constructors could be given a priority and run in a specific order, allowing the runtime to initialize subsystems before and after each other. E.g., the memory allocation (malloc) subsystem might be needed for buffered file I/O.
On most platforms 5, the linker was called in to do the priority work: each platform ended up with a way to prioritize the order in which data gets written to sections, which allowed for the C runtime to end up with a well-ordered list of function pointers 6.
We can even build an example of this by hand in Rust using the #[unsafe(link_section = "...")] attribute (try it in the Rust Playground):
/// Linux example: the modern glibc runtime uses `.init_array` to hold function/// pointers, and a numeric suffix allows them to be ordered. Note that priorities/// less than or equal to 100 are reserved for the runtime itself, so any code that/// wants to use the C runtime must use a priority of 101 or higher.// On Linux, `.init_array` holds _function pointers_, not functions.// We can convert a function to a function pointer with one of the below// blocks which is equivalent to this://// #[used] // <-- without this, Rust might decide the init function is unused and remove it// #[unsafe(link_section = ".init_array.NNNNN")] // <-- the section where we place the function pointer// static INIT_ARRAY_FN_PTR: extern "C" fn() // = function; // <-- the function pointer data: we assign the function to it//// extern "C" fn function() { ... } // <-- the function itself#[used]#[unsafe(link_section=".init_array.101")]staticINIT_FN_FIRST:extern"C"fn()=const{extern"C"fninit(){println!("Initializing (first!)");}init};#[used]#[unsafe(link_section=".init_array.201")]staticINIT_FN_SECOND:extern"C"fn()=const{extern"C"fninit(){println!("Initializing (second!)");}init};fnmain(){println!("Main!")}
linktime: ctor, link-section and more
The examples in this post will work on Linux and various BSDs, but are not designed to be cross-platform examples. For example, macOS has start and stop symbols, but they are named differently 7. Windows does not support start and stop symbols, but has a set of rules for sorting sections that is effectively equivalent.
Because platforms are so widely variable, we’ll be introducing the ctor and link-section crates (from the linktime project) as a way to abstract away platform-specific differences and hide the general complexity of linker work.
The excellent inventory and linkme are two other very popular crates built on the same principles, but have limitations 8 that make them less suitable for the examples in this post.
The ctor crate is designed to handle all of the boilerplate of registering constructors in a cross-platform way. This allows us to simplify our examples above to:
Note that neither example explicitly calls the init functions. The linker organized them in a way that the C runtime called them for us!
Sections and Linker Scripts
The process in which constructors are linked isn’t mysterious, though. In fact, compilers allow you to name the location in the binary (on most platforms called a “section”) you want to place any of your data and/or code. And by extension, and as we saw above, Rust allows this as well. The challenge, as we will see, is making use of this organizational feature.
Linkers have been the key to C’s ability to target any form of binary for some time. Most linkers allow for developers to provide linker scripts - text files that live alongside your source code (which is compiled to object files) and instruct the linker on how those object files are assembled. Using a linker script, a single C file might become a Linux executable, or a block of raw assembly that lives in the boot sector of a hard drive.
Linker scripts also allow for defining virtual symbols - that is, symbols that don’t exist in any source file but can be used by C code to access pointers to the underlying data in the loaded binary.
Linker scripts are a complex topic and beyond the scope of this post, but we can easily find examples of them in the wild:
In the above example, the virtual symbols _TEXT_START_ and _TEXT_END_ are explicitly defined to point to the beginning and end of the .text section, respectively. The period in _TEXT_START_ = .; is a special syntax that refers to a location counter that resolves roughly to the current output address in the binary.
Linker Symbols
This trips up most developers that encounter it for the first time, but the linker is setting the address of the start and end symbols, and therefore where the static with the same name is placed, and not setting the value of symbols that are pointers. That is to say: the start and stop symbols aren’t a *const Type. The start and stop symbols carry no data themselves and are used for their addresses only! The section consists of the range of data between the start (inclusive) and stop (exclusive) symbols.
Section
Static
Value
Linker symbol(s)
my_numbers
_DATA_1
11
⎫ ⎬ ⎭
_DATA_1, _start_my_numbers
_DATA_2
22
_DATA_2
_DATA_3
33
_DATA_3
_DATA_4
44
_DATA_4
(past the end)
↤
_stop_my_numbers
Specifying start and end symbols for every section can be complex and tedious in linker scripts, so many linkers 9 eventually gained a feature where they could automatically define symbols bounding all sections in the executable. E.g., for GNU toolchains, a section named MY_SECTION will automatically have symbols __start_MY_SECTION and __stop_MY_SECTION defined. macOS has a similar pattern where it synthesizes a section$start and section$end symbol for each section.
In the GNU linker, those sections not explicitly defined in the linker script are called “orphan sections” 10. One important thing to note: if (and only if!) a section’s name is compatible with a C symbol name, the linker will automatically define a _start- and _stop-prefixed symbol for the section. In the example you’ll see below, the section name our_strings that we used works, but if we had chosen our.strings or .our_strings it would not have!
You’ll see in the example below that the start and stop symbols are MaybeUninit<()>. The boundary symbols contain no data, and only their address is significant.
The ideal Rust type for these would be an “opaque external type” (this would be implemented by the extern_types feature). As these are not currently implemented in Stable Rust, MaybeUninit is a stand-in. It signifies to the compiler that the data is uninitialized, and generally not safe to read via reference. Since taking a &raw const pointer to a static item is always valid, however, we can still safely capture its address without ever reading its value.
usestd::mem::MaybeUninit;#[used]#[unsafe(link_section="our_strings")]staticFIRST_STRING:&'staticstr="Hello, ";#[used]#[unsafe(link_section="our_strings")]staticSECOND_STRING:&'staticstr="world!";// Note: these are not pointers. Instead, the linker has placed// the boundary symbols STATIC_STRING_START and STATIC_STRING_END at// the start and end of the section!unsafeextern"C"{#[link_name="__start_our_strings"]staticSTATIC_STRING_START:MaybeUninit<()>;#[link_name="__stop_our_strings"]staticSTATIC_STRING_END:MaybeUninit<()>;}fnmain(){letstrings:&'static[&'staticstr]=unsafe{// SAFETY: get the addresses of the start and end symbols without// reading them.letstart=&rawconstSTATIC_STRING_STARTas*const&'staticstr;letend=&rawconstSTATIC_STRING_ENDas*const&'staticstr;std::slice::from_raw_parts(start,end.offset_from(start)asusize)};// "Hello, world!"println!("String: {}",strings.join(""));}
The link-section crate is designed to abstract away the details of these linker sections and convert them into traditional Rust slices with all standard slice operations available. We can use it to simplify the example above to:
In these examples we’re submitting items to the link section in a single module within a single crate, but that’s not a requirement. In fact, the power of link sections is that you can submit items to a link section from any crate that contributes code to a binary - the linker will gather them all together just before writing the final binary.
Dependency Injection
The registration pattern we’re about to build is Dependency Injection by another name. This is a well-known pattern: frameworks like Dagger and Spring are built on the same principle that consumers of registration data should not be coupled to the providers of that data. A provider registers data at its definition site, a consumer simply reads the registry.
What’s somewhat different with linker sections versus traditional DI is that in DI the framework often needs to walk the module graph or scan loaded classes at startup to discover both providers and consumer sites. With linker sections, this magic is handled when the binary is written. The linker is the one that gathers all of the provider data and makes it trivially available to the consumer.
The example below uses a link_section::section to register CLI subcommands and is an instance of this pattern. More complex projects like Turbopack use this pattern to register string-pool constants, and the registration machinery used for serialization/deserialization and turbotask incremental compilation functions. A hypothetical webserver could make use of this pattern to register routes and middleware that are automatically collected at build time. The core mechanism is the same: the contributors place data into a shared registration system from any crate in the dependency tree, and the consumer reads the collected data without having to know where it was provided from.
Using Sections for Registration
One advantage we have in doing work before main is that it is well-behaved. No threads are running unless we start them. This means we are able to avoid the complexity of locks and other synchronization primitives in many cases, and that we can explicitly split our writable and immutable phase of our data’s lifecycle clearly: before and after main. And because of that, accessing data in the running program can become both simpler and more efficient by avoiding the need to acquire and release locks.
First, we’ll define our subcommand, a const constructor function, and a #[section] to collect them:
Then we’ll register subcommands - these can live anywhere in your code:
modlist{#[in_section(CLI_SUBCOMMANDS)]staticCLI_SUBCOMMAND_LIST:CliSubcommand=CliSubcommand::new("list","List all items",|_exe,_args|{println!("Listing all items");});}modadd{#[in_section(CLI_SUBCOMMANDS)]staticCLI_SUBCOMMAND_ADD:CliSubcommand=CliSubcommand::new("add","Add a new item",|_exe,_args|{println!("Adding a new item");});}modhelp{#[in_section(CLI_SUBCOMMANDS)]staticCLI_SUBCOMMAND_HELP:CliSubcommand=CliSubcommand::new_default("help","Show help",|exe,_args|{println!("Usage: {} <subcommand> [options]",exe.display());println!();println!("Subcommands:");forsubcommandinCLI_SUBCOMMANDS{println!(" {}: {}",subcommand.name,subcommand.description);}});}
And then in our main function we can dynamically dispatch to any registered subcommand without ever having to know what they are or where they live. It only needs to be able to see the CLI_SUBCOMMANDS section definition:
fnmain(){letmutargs:VecDeque<String>=std::env::args().collect();letexe=args.pop_front().expect("No executable name provided");letexe=Path::new(&exe);letsubcommand_name=args.pop_front().unwrap_or_default();letrest:Vec<String>=args.into();// Try to find the subcommand by nameforcmdinCLI_SUBCOMMANDS{ifcmd.name==subcommand_name{(cmd.f)(exe,&rest);return;}}// If no subcommand was found, fall back to the default subcommandforcmdinCLI_SUBCOMMANDS{ifcmd.is_default{(cmd.f)(exe,&rest);return;}}}
Running the code above works as you’d expect:
$ ./cli
Usage: ./cli <subcommand> [options]
Subcommands:
list: List all items
add: Add a new item
help: Show help$ ./cli list
Listing all items
Beyond Immutable Data
This section deals with some more advanced topics. Familiarity with Rust Atomics and Locks, or at least reading the first chapter on the basics of Rust concurrency, is recommended!
The example above assumes that the linked data is immutable. But that’s only half the power of using linker organization for data. Mutability in global static data is a common problem with well-known solutions in standard Rust. We could potentially use Rust’s built-in tools for interior mutability like mutexes, or atomic types, for example. Each of those comes with some runtime cost. If they are “uncontended” they aren’t expensive, but they are not necessarily free. 11
But what if we want to minimize the overhead of runtime data access? Immutable data is trivial: Rust allows safe concurrent access to immutable data by default 12. Rust has strict requirements for mutable data, however. There are two requirements to safely mutate data: (1) the modifications must be done in a thread-safe manner, and (2), there must never be more than one reference to the data if a mutable reference exists.
At the beginning of this post, we mentioned that life-before-main is a useful place to bootstrap because no threads are running unless we start them. And the solution to (1) is trivial if the data is currently accessible to a single thread only! We don’t need to do anything atomically; we only need to ensure that all of the changes we make to that data “happen before” any reads to the data. In a single-threaded environment, “happens before” is automatic 13. This means that we can mutate data in a link-section before main and it will be safe to access, lock free, from any thread after main.
The resolution for (2) is similar: as long as we only ever take a mutable reference (and only a mutable reference!) before main, there will never be more than one reference to the data when a mutable reference exists.
The pre-main environment satisfies both (1) and (2), without needing to reach for locks or other synchronization primitives.
There’s also one additional gotcha with linker sections we need to be very careful with: the slice that contains all of the items in a section is an alias to the static item that lives in the section. The rules about aliasing apply to both the slice and the static item, and you must ensure that static items are placed in UnsafeCell to safely mutate them from the slice 14. Rust does not allow a static item to be modified through other means. With static items that aren’t wrapped in an UnsafeCell, LLVM may consider itself free to cache, reorder or otherwise make assumptions about the data itself. UnsafeCell itself is not Sync, so you’ll need to add your own wrapper types on top of this!
Note that in the example below, we’re now using MaybeUninit<SyncUnsafeCell<...>> for the boundary symbols and SyncUnsafeCell<...> for the items.
Because we’re planning on sorting the slice, we need to tell Rust that the slice items are not immutable so the data doesn’t end up in read-only memory. By using a type that includes UnsafeCell - a semantic signal that Rust uses to indicate interior mutability - the Rust compiler will then know to place that data in a part of the binary that can be written.
On some platforms (Windows in particular), omitting this from the data items will cause segmentation faults when trying to sort the slice. On other platforms (AIX for example), section mutability is part of a section’s identifier, so the boundary symbols’ mutability needs to match the section’s mutability!
Let’s walk through an example of how we might otherwise do something like this. We’re going to build a string interning pool defined entirely at link-time, and add a wrinkle: we want to be able to sort the slice of interned strings at runtime so we can quickly intern a string by value if needed via binary search (try it in the Rust Playground):
usestd::cell::UnsafeCell;usestd::mem::MaybeUninit;#[cfg(debug_assertions)]usestd::sync::atomic::{AtomicBool,Ordering};/// Nightly Rust offers a built-in `SyncUnsafeCell`. This is a minimal/// reimplementation of that: /// <https://doc.rust-lang.org/std/cell/struct.SyncUnsafeCell.html>#[repr(transparent)]structSyncUnsafeCell<T:?Sized>(UnsafeCell<T>);// SAFETY: safety burden of UnsafeCell is placed entirely on the userunsafeimpl<T:?Sized+Sync>SyncforSyncUnsafeCell<T>{}macro_rules!intern_string{($name:ident,$string:literal)=>{#[allow(unused)]const$name:&'staticstr=const{// This is not a common pattern, but it's entirely valid// to nest static items inside of const blocks. // You can think of this as a way to hide the symbols// in a completely anonymous namespace.constVALUE:&str=$string;// Safety note: this static must _never_ be used. This is// purely a submission to the linker and _any_ access to it// may be UB.#[used]#[unsafe(link_section="our_strings")]staticITEM:SyncUnsafeCell<&'staticstr>=SyncUnsafeCell(UnsafeCell::new(VALUE));VALUE};};}intern_string!(WORLD,"world");intern_string!(EXCLAMATION,"!");intern_string!(HELLO,"hello");intern_string!(FROM,"from");intern_string!(RUST,"Rust");unsafeextern"C"{#[link_name="__start_our_strings"]staticSTATIC_STRING_START:MaybeUninit<SyncUnsafeCell<()>>;#[link_name="__stop_our_strings"]staticSTATIC_STRING_END:MaybeUninit<SyncUnsafeCell<()>>;}/// Debug check to make sure the slice is sorted once and only once. This _could_/// be enabled in release mode without any major performance impact, but we have enough/// guarantees in place. Note that atomic access _does_ establish some memory ordering/// guarantees, but the soundness guarantees are upheld with or without this atomic check.#[cfg(debug_assertions)]staticSLICE_IS_SORTED:AtomicBool=AtomicBool::new(false);// Implementation note: this function must not be called before `SORT_STRINGS_CTOR` has// run.fninterned_strings()->&'static[&'staticstr]{// We use Acquire/Release pairing as a double-initialization check#[cfg(debug_assertions)]debug_assert!(SLICE_IS_SORTED.load(Ordering::Acquire),"Oh no! Slice was not sorted!");// SAFETY: we are calling this after main and we can guarantee that no// mutable reference is still alive. Since we know that no other code// is running before main, and that `SORT_STRINGS_CTOR` will run before main,// we can guarantee creating these slices is safe as 1) the sort "happens-before"// any access and 2) the mutable reference has been closed before any read-reference// access (satisfying aliasing XOR mutability requirement).letstrings:&'static[&'staticstr]=unsafe{letstart=&rawconstSTATIC_STRING_STARTas*const&'staticstr;letend=&rawconstSTATIC_STRING_ENDas*const&'staticstr;std::slice::from_raw_parts(start,end.offset_from(start)asusize)};strings}// Implementation note: this function assumes the slice has been sorted. See// the guarantee above on `interned_strings` for reasoning.fnmaybe_intern_string(s:implAsRef<str>)->Option<&'staticstr>{lets=s.as_ref();letstrings=interned_strings();strings.binary_search(&s).ok().map(|index|strings[index])}// SAFETY: We use the reserved `.init_array.0` priority because we do not// access any C runtime functions (sort_unstable does not allocate) and we// want to run before all other code. `.init_array.101` would work in our// case, but this prevents other early-init code from accidentally running// in the wrong order. `SLICE_IS_SORTED` is a debug check to make sure that// doesn't happen. Note that all early-init code is tagged with `unsafe` so// it always needs to be aware of safety guarantees of all APIs it touches.#[used]#[unsafe(link_section=".init_array.0")]staticSORT_STRINGS_CTOR:extern"C"fn()=const{extern"C"fnsort_strings(){// We use Acquire/Release pairing as a double-initialization check#[cfg(debug_assertions)]debug_assert!(!SLICE_IS_SORTED.load(Ordering::Acquire),"Oh no! Sorted twice?!?");// SAFETY: we are calling this before main and we can guarantee that no// reference from `interned_strings` exists yet because we know no other// threads will be running, and we're not calling `interned_strings` yet.letstrings:&mut[&'staticstr]=unsafe{// SAFETY: the bounds markers are not mutable, but we can safely// cast them to mutable pointers because we know the data behind// them is stored within `UnsafeCell` which is Rust's way of // giving us interior mutability.letstart=&rawconstSTATIC_STRING_STARTas*mut&'staticstr;letend=&rawconstSTATIC_STRING_ENDas*mut&'staticstr;std::slice::from_raw_parts_mut(start,end.offset_from(start)asusize)};strings.sort_unstable();#[cfg(debug_assertions)]SLICE_IS_SORTED.store(true,Ordering::Release);}sort_strings};fnmain(){for(i,s)ininterned_strings().iter().enumerate(){println!("[{i}]: {s}");}println!("{}, {}{}",HELLO,WORLD,EXCLAMATION);println!("{}, {}{}",maybe_intern_string("hello").unwrap(),maybe_intern_string("world").unwrap(),maybe_intern_string("!").unwrap());}
The above example is pretty heavy (and a bit thicker thanks to the generous commentary), but it’s a good example of how much boilerplate crates like ctor and link-section can save you.
The equivalent using those crates can make use of the TypedMutableSection and a ctor to ensure the items are sorted before main. Note that the requirements for TypedMutableSection are that the items must be const - the reason is that the mutable section uses a similar style of code to the manually-implemented example above.
//! String interning pool using `ctor` and `link-section`.usector::ctor;uselink_section::{in_section,section};#[section(mutable)]staticINTERNED_STRINGS:link_section::TypedMutableSection<&'staticstr>;#[in_section(INTERNED_STRINGS)]constWORLD:&'staticstr="world";#[in_section(INTERNED_STRINGS)]constEXCLAMATION:&'staticstr="!";#[in_section(INTERNED_STRINGS)]constHELLO:&'staticstr="hello";#[in_section(INTERNED_STRINGS)]constFROM:&'staticstr="from";#[in_section(INTERNED_STRINGS)]constRUST:&'staticstr="Rust";#[ctor(unsafe)]fnsort_strings(){letstrings:&mut[&'staticstr]=unsafe{INTERNED_STRINGS.as_mut_slice()};strings.sort_unstable();}fnmaybe_intern_string(s:implAsRef<str>)->Option<&'staticstr>{lets=s.as_ref();letstrings=INTERNED_STRINGS.as_slice();strings.binary_search(&s).ok().map(|index|strings[index])}fnmain(){for(i,s)inINTERNED_STRINGS.iter().enumerate(){println!("[{i}]: {s}");}println!("{}, {}{}",HELLO,WORLD,EXCLAMATION);println!("{}, {}{}",maybe_intern_string("hello").unwrap(),maybe_intern_string("world").unwrap(),maybe_intern_string("!").unwrap());}
This particular example isn’t impossible without link sections, of course. What we get from the patterns we’ve discussed in this post are three things: (1) the guaranteed aggregation of tagged items, with all data pre-allocated and contiguous in memory; (2) the ability to distribute registrations anywhere in the code; and (3) a guaranteed count of the items in the section.
One major benefit that falls out of the three advantages above is that link sections require no allocations. If we were to rewrite this without link sections we’d be allocating a HashMap, Vec or other data structure, and potentially resizing it a number of times as we gather items (because we don’t actually know how many items we’ll have until runtime!).
The second major benefit that falls out is the Inversion of Control. The dependency graph for a traditional “collection” approach looks like below, with shared types deeply nested in the dependency graph, modules depending on that shared types module, and then a collector module that depends on all those modules to collect their types:
The change doesn’t seem large, but there is a large impact: the collector can now live anywhere and no longer needs to care what modules are contributing data:
And of course, we aren’t just limited to slices: you’ll find that there are analogues to many data-structures with link-time support in the scattered-collect crate:
Scattered*Slice: Various Vec-like structures that provide slices (and optionally sorting).
ScatteredMap/ScatteredSet: An analogue to HashMap/HashSet that provides hashed key-to-value lookup with some minimal pre-main initialization.
But Seriously: When Not to Use This
Link-time computation is fun and powerful, and it’s not always the right tool for the job. There is often a non-link-time equivalent: manually collecting data in crates that have visibility into each crate that wishes to contribute data. This can be inconvenient at times - instead of the contributors seeing a single contribution point “upstream” in a core crate, a “collector” crate with lots of crate references is required to collect them all.
Dead-code elimination becomes challenging: the link-section crate (and the linkme equivalent) both decorate all items using #[used], so the linker is disallowed from pruning unused data. Figuring out how to make link-time collection and dead-code elimination work well together is a complex problem beyond the scope of this post. For smaller bits of data like interned string atoms this might not be a problem, but if a program wants to intern larger chunks of data like chunks of raw JSON/JavaScript, or extensive data structures, this may add up to a lot of dead-code that may be difficult to identify.
Pre-main constructor functions have limitations: they cannot panic 15, Rust does not guarantee that all stdlib functions are available, and the order that the initialization functions are called within a given priority level is not guaranteed and highly platform-dependent. With careful planning, these limitations may be worked around but life-before-main may not be correct for subtle and difficult-to-debug reasons.
At this time, Miri is not fully compatible with all pre-main constructors and link-section constructions: it has a very basic view of pre-main execution, and does not model link sections at all. This may improve over time, but as of the time of writing, LLVM sanitizers (ASan, TSan, and others) are the recommended way to test for undefined behaviour.
The Inversion of Control pattern also has a cost: it makes it potentially harder to audit all the places that contribute data to a link section.
In reality, many widely-deployed and heavily-used Rust programs already rely on pre-main functionality: the ctor, link-section, inventory and linkme crates are used by many downstream crates today.
Briefly, on WASM
The examples above omitted a fairly important platform, though for good reason. WASM does not currently support linker sections natively because of an inconvenient choice many years back (51088 and 52353 for more details). Instead of allowing the #[link_section] annotation to place items in a true code section, the items are placed in a WASM custom section which is inaccessible to the WASM code itself!
The linktime crates do support WASM and have an emulation workaround that makes the approaches work for WASM binaries, but the author of this post hopes to make a suggestion in the near future on how proper WASM support could be added!
Conclusions
You can do a lot before main, and the benefits of doing so are pretty significant for certain cases. It’s a highly-ordered, highly-controllable environment that lets you more confidently do a lot of work without locks, atomics and other synchronization primitives. Link sections give you arbitrary aggregation and co-location of related data across your whole binary without awkward crate dependency order. In a lot of cases you can even avoid allocations completely which helps keep you away from one of the worst allocator sins: churn of allocations leading to fragmentation.
For further reading, check out the various crates discussed in this post:
ctor: Module initialization functions that run before main
dtor: Not discussed in this post, but the shutdown analogue to ctor
link-section: Linker-managed typed (slices) and untyped sections, with mutability support.
Thanks to my lovely wife Mia, Benjamin Woodruff and Luke Sandberg, as well as @ssokolow for their feedback and review. This post would not have been possible without their help.
Go is a notable exception in that it avoids the C runtime on some platforms, only using libc as an ABI stability boundary on platforms that require it e.g., Apple’s libSystem.dylib and OpenBSD’s libc. ↩
On Windows, these are DOS-style (which were in turn derived from CP/M-style) arguments. ↩
Before the loader runs, the program is just some bytes on a disk and the loader (which can be the kernel itself or a user-space system component like ld.so on Linux) maps those bytes into memory and hands off control. ↩
The most popular method… in the humble author’s opinion. ↩
macOS does not support this. The C runtime does its own initialization and then just runs every user constructor function in the order the linker saw them. ↩
AIX has a special symbol naming convention for constructor functions: the sinit prefix, followed by a hexadecimal priority value. ↩
This will be discussed later in the post, but macOS synthesizes a section$start and section$end symbol for each section instead of a __start_ and __stop_ symbol. ↩
linkme creates distributed slices, but does not currently support WASM, and does not support mutable section data required to sort a section. inventory supports WASM, but requires a ctor-like function per item in the section. ↩
For example, an atomic value must always be re-read, and that may incur use of CPU cache which is pretty numerous these days, but definitely not infinite. ↩
As long as it’s Sync. Sync means that it’s safe to share a reference to the data between threads. ↩
This is a complex topic, and Rust Atomics and Locks is the best resource for learning more. Starting a new thread means that all the previous writes “happen before” anything on the new thread, but we’ll leave the proof of this for the reader (or possibly a future post). ↩
Well, more accurately they can panic but they shouldn’t panic. In fact you’ll get a double panic: thread '<unnamed>' panicked at ...: pre-main panic! and then immediately thread '<unnamed>' panicked at ...: panic in a function that cannot unwind. ↩
Deriving a Bit-Twiddling Hack: Signed Integer Overflow
As a thin layer on top of assembly language, C’s integer arithmetic APIs have always been minimal, effectively just mapping the underlying assembly opcodes to the C arithmetic operators. In addition, while unsigned arithmetic can safely overflow in C, signed arithmetic overflow is considered undefined behaviour, and UB can end up in heartache for C developers.
More modern languages like Rust have a much richer integer API, however. By default, using the standard addition and subtraction operators in debug mode, integer APIs will panic! on overflow or underflow. The same operators will wrap in two’s-complement mode in release mode, though the behaviour is considered defined. If the developer wants to specify carrying, wrapping, checked, or saturating operations, APIs for each of these modes are available.
We don’t have these convenient APIs available in C yet (see the epilogue for some nuance), but it would be great to have them. Given that signed arithmetic overflow is undefined behaviour, can we build a function with the following C signature that works?
boolwill_add_overflow(int32_ta,int32_tb);
All modern machines use two’s complement representation for negative integers, but C was developed when computing was experimenting with other forms of representing signed integers. In this post, we will safely assume that all processors we’re targetting on are not using one of the alternative forms. If you find yourself programming for esoteric machines, you may wish to consult your local manual or guru.
A valid, quick-and-dirty solution to this would be to use integer promotion and add 64-bit signed integers instead, checking to see if the result is within range of an int16_t:
boolwill_add_overflow_64bit(int32_ta,int32_tb){// a and b are promoted to 64-bit signed integersint64_tresult=(int64_t)a+b;if(result<INT32_MIN||result>INT32_MAX){returntrue;}returnfalse;}
No undefined behaviour! It also has the advantage of being easily read and obviously correct. But this required sign-extending two 32-bit numbers and performing two 64-bit additions:
We can do better by taking advantage of the fact that on two’s-complement machines, addition is bitwise-identical between signed and unsigned numbers so long as you ignore carry, overflow, underflow and any other flags. In addition, the C specification (C99 6.3.1.3 ¶2) guarantees that the bit pattern will be preserved on a two’s-complement system.
We know that unsigned overflow is not UB, and we know that we can only overflow if a > 0 and b > 0, and we can only underflow if a < 0 and b < 0. If either a or b is zero, we’re safe. We also know that adding two positive integers must result in a positive result if no overflow occurred. For two negative integers, the result must also be negative. If we find that the sign of the sum does not match the sign expected, we’ve wrapped around!
boolwill_add_overflow_if(int32_ta,int32_tb){// Explicitly convert to uint32_t and then backint32_tc=(int32_t)((uint32_t)a+(uint32_t)b);if(a>0&&b>0&&c<0){returntrue;}if(a<0&&b<0&&c>=0){returntrue;}returnfalse;}
And we get a fairly hefty assembly representation:
This is arguably a bit worse, as now we have a branch in the mix. But we can start to see a pattern here:
a
b
c
result
> 0
> 0
< 0
true
< 0
< 0
>= 0
true
In two’s-complement, the expression x < 0 is equivalent to the expression (x & 0x80000000) == 0x80000000. Similarly, x >= 0 is equivalent to (x & 0x80000000) == 0.
Let’s create a NEG macro with the above expression and reproduce our pseudo-truth table in code. Note that we’ll also collapse the if statements into a single boolean expression so we can eliminate those branches:
boolwill_add_overflow_expression(int32_ta_,int32_tb_){// Explicitly work with uint32_t in this functionuint32_ta=(uint32_t)a_,b=(uint32_t)b_;uint32_tc=(uint32_t)a+(uint32_t)b;#define NEG(x) (((uint32_t)(x) & 0x80000000) == 0x80000000)
return((!NEG(a)&&!NEG(b)&&NEG(c))||(NEG(a)&&NEG(b)&&!NEG(c)));#undef NEG
}
This is looking better, but because we’re using short-circuiting logic, those branches are still there: we still have a jump!
Notice that the assembly gives us a bit of a hint here that repeated use of our macro isn’t actually necessary. The sign bit we’re interested in isn’t tested until the end of the function! Because we’re testing the same bit in every part of the expression, and bits in a given position only interact with other bits in the same position, we can pull that bit test out of the whole expression:
Not too bad! But let’s revisit the truth table and instead use the value of the sign bit directly. What we see is that a and b need to be the same value, and c needs to be the opposite value:
a
b
c
1
1
0
0
0
1
This truth table shows that what we ultimately want to test is this:
(a == 1 && b == 1 && c == 0) || (a == 0 && b == 0 && c == 1)
… but with a bit of work, we can simplify this down to two shorter expression candidates:
(a == b) && (a == !c)
(c == !a) && (c == !b)
For bit twiddling like we’re doing here, xor (^) can work like a “not-equals” operator (outputs 1 iff the inputs are 0,1 or 1,0), which means we can re-write our two expressions like so:
~(a ^ b) & (c ^ a)
(c ^ a) & (c ^ b)
By looking at those two options, is there a hint that one might be cheaper to implement? Let’s plug both into the compiler and see what we get!
We have a clear winner here: the compiler can do a much better job with (c ^ a) & (c ^ b). This is most likely because of the common sub-expression and the removal of the bitwise-not operator.
It turns out that both GCC and LLVM have C intrinsics that you can use. While they are non-portable to some compilers, they drastically simplify the assembly output!
I was hoping to make more progress on self-hosting my scripting language (Kalos) this week, but I’m running out of steam because I think I coded myself into a corner. This is not a post where I’ve got everything figured out, but instead I’m taking a few moments to re-hash where things are at and figure out a plan for the future.
My original plan for this language was to offer a Python-like experience with minimal resource requirements: it should be able to run on an AVR, on bare metal, or even as part of a DOS executable. I had originally planned to support compilation on those devices, and even built a zero-allocation parser. The runtime is lightweight, integers are a configurable size, and strings are even optional. I believe it’ll be a great option on lower-end devices where Python is just too heavy.
Over the last week I started work to extract a small piece of the parser that deals with KIDL (example of KIDLE below), the part of the language that glues it to your C code. This is currently part of the existing parser, and the only piece that I could think of to carve off on the slow march to true self-hosting.
I also ended up hacking in some dynamic-dispatch objects that help with not having classes, but that’s not a long-term thing that I want to support in lieu of a proper object/class system.
Eventually I’ll have to commit to rewriting the whole parser in Kalos, but as the title of the post suggests, I’m stuck in a potential energy well where the next steps are going to be difficult. The current parser is written in C and – while the code is pretty clean – it’s a lot of work to make changes to it. It’s going to take some time and effort to add support for things like classes, tear-off functions, etc, and being allocation-free doesn’t make any of this easy.
My mistake was being too ambitious and going right for C as the bootstrap, rather than something higher level. I should have started with Python as the bootstrap!
So I need to gather enough energy to choose and work on one of the following paths:
Commit to rewriting the parser in Kalos, maybe after adding support for hashtables/dicts to the language. The language spec is still small enough that I could port the current parser. Debugging is very difficult, and you need to ensure that you’re running the code while developing it to discover if you’ve accidentally stepped on one of the many landmines. Once I have the parser/compiler in a higher-level language like Kalos itself, these landmines will be much easier to fix!
Rewrite the parser in Python, knowing that I’ll have to rewrite it in Kalos later. This might not be terrible because the language is supposed to be python-like and there might be a mechanical translation route available. The thought of writing more code to throw away doesn’t fill me with a lot of joy, but it might just be what I have to do.
Scrap the hand-rolled parser and switch to something like Lemon. We’re already using the amazing re2c to write the lexer, so adding another tool isn’t a bad idea. Again, we’re putting in a bunch of effort knowing that this will be tossed away later, but maybe there’s a middle ground like just having Lemon build an AST, then have Kalos script generate the bytecode?
Hacking Bluetooth to Brew Coffee from GitHub Actions: Part 3 - GitHub Actions
This is the last part of a three-part series covering the odyssey of getting a new coffeemaker, learning BTLE and how it works, reverse-engineering the Bluetooth interface and Android applications for the coffeemaker, writing a Rust-based CLI interface, and finally, hooking it all up to a GitHub actions bot that lets you brew a coffee just by filing an issue!
In part 2 we got the command-line application working, and now it’s time to connect the dots and build a secure, yet web-accessible interface.
We could choose a standard web host, add some sort of authentication on top of it, build the right web tooling to integrate with the nice command-line application we built, and all the associated security so random people can’t brew coffee. But as you’ve guessed from the title of these posts, we’re going hook this command-line app into a private GitHub repo as our “interface”.
Making use of GitHub issues for automating weird things isn’t new, but I think this is the first time you can make coffee from it!
Getting Started
Here’s our goal:
We want to allow users to brew a coffee from a GitHub issue, which will be pre-populated from a number of pre-defined templates
The issue will contain part of the command-line that we want to run, and we’ll need to validate that it’s reasonable and correct, and that nobody is trying to inject any sort of “funny business” to break/backdoor the runner
We don’t want coffee brewers to have to chase down the status of the brewing operation, so we’re going to make use of issue comments as our basic UI. The user will be able to follow the progress of their coffee inside of the issue, and get a notification when it’s done.
This is what the user will see just before they brew the coffee:
The first question you might have is how we’re going to talk to a Bluetooth coffeemaker from GitHub’s system. This part turns out to be pretty easy: we can use GitHub self-hosted runners as a backdoor into the coffeemaker’s physical location! By running this on a computing device that has a Bluetooth radio in proximity to the coffeemaker, we can send commands to it in response to events occurring in a repo. Conveniently the Raspberry Pi 3 Model B and Pi 4 both support Bluetooth, but in our case we’re going to be using a spare MacBook that’s kicking around.
First thing, we need to create a new runner on GitHub for our project, and then set up the runner on the MacBook:
GitHub actions are pretty flexible and we have a huge number of events that can trigger them. In our case, we want the creation of a new issue to trigger a run, so our trigger becomes:
on:issues:types:[opened]
We’ll pull in the create-or-update-comment action from peter-evans for updating the user about the status of their coffee:
And once the coffee is brewed or the process has failed for some other reason, we’ll want to close that issue, so we’re going to pull in peter-evans/close-issue for this:
The actual brewing part will be pretty easy as well, but it’s going to require use to fetch the text of the issue and use that to create the command-line to run.
Let’s take a look at the event information that GitHub provides to us in $GITHUB_EVENT_PATH. There’s a lot that GitHub provides for us in this file, and this particular one is trimmed down significantly:
{"action":"opened","issue":{..."body":"This is my issue body comment\r\n",..."title":"This is my issue title!",...}...
jq is one the best tools for integrating JSON APIs with shell scripts, so we’ll make use of that. We’ll create a small test JSON file called test.json that contains just the interesting subset of what’s available in the file at $GITHUB_EVENT_PATH:
{"action":"opened","issue":{"body":"This is my issue body comment\r\n","title":"This is my issue title!"}}
First, we can test extraction of the issue body:
$ jq -r'.issue.body' < test.json
This is my issue body comment
$
That worked, but we’ve got some extra whitespace there. We can trim that with another jq command, gsub. By replacing leading or trailing whitespace (gsub("^\\s+|\\s+$";"")) with nothing, we can get just the text of the comment:
$ jq -r'.issue.body|gsub("^\\s+|\\s+$";"")' < test.json
This is my issue body comment
$
Better!
Extracting the Command-Line
Now what we want to do is allow the user to specify the command-line in the issue, but ensure that they can’t run anything nefarious on the runner. We developed a command-line cappuccino recipe in part 2 that we ran like this:
Since we are creating a valid partial command-line for our brewing app, we can make use of that fact that we know the exact structure. In this case, we know we want it to:
Start with the subcommand brew
Next, contain the beverage to brew with --beverage <something>
Finally, contain a list of beverage parameters which are limited to coffee, milk, hotwater, taste, and temperature. Each parameter is separated from its value by a space (ie: --coffee 100), and is either a number or an enumeration value (ie: --taste strong).
We can then build a regular expression that will be limited to just the arguments we’re allowing here. We’ll use the \w character class as it’s a close match to the values required by our parameters.
We could go further in validating the --beverage parameter, or the values for the ingredients, but we know that those are carefully checked in the application and we’ll let the application handle the validation:
Next, we’ll process the requested brew operation using the jq incantation from earlier. This step will create a body.md that we’ll use to update the comment, as well as cmdline.txt that will be used to execute our brewing operation later on:
-name:Process the requestrun:|OUTFILE=body.mdCMDLINE=$(jq -r '.issue.body |gsub("^\\s+|\\s+$";"") |select(test("^brew --beverage \\w+( --(coffee|milk|taste|hotwater|temperature) \\w+)*$"))' < $GITHUB_EVENT_PATH)echo Command-line we parsed was: $CMDLINEif [[ "$CMDLINE" == "" ]]; thenecho " - [X] Couldn't parse the command line from your comment? 🤔" > $OUTFILEexit 1fiecho -n ' - [X]' Running brew command: \`$CMDLINE\` > $OUTFILEecho ' [(Log here)](https://github.com/'${GITHUB_REPOSITORY}'/actions/runs/'${GITHUB_RUN_ID}')' >> $OUTFILEecho "/tmp/longshot/bin/longshot $CMDLINE --device-name $" > cmdline.txt
-name:Brew coffeerun:|echo '<details><summary>Log</summary><pre>' > log.mdsh -c "`cat cmdline.txt`" | tee -a log.mdecho '</pre></details>' >> log.mdecho '✅ Success!' >> log.md-name:Update comment on successuses:peter-evans/create-or-update-comment@v2with:issue-number:$comment-id:$body-file:log.md
Finally, we’ll log a message to the comment on an error, and close the issue unconditionally:
-name:Update comment on failureif:failure()uses:peter-evans/create-or-update-comment@v2with:issue-number:$comment-id:$body:|<br>❌ Failed! Please check the log for the reason.-name:Close issueif:always()uses:peter-evans/close-issue@v2
And with all those steps, we can get ourselves a coffee from GitHub!
While you can’t access my private repository that I’m using to brew us coffee at home, you can definitely try out the example repo that I’ve set up here which uses the command-line interface’s simulator and runs on GitHub’s action runners instead: